Description
How To Get Epson EP709A Adjustment Program Hardware ID
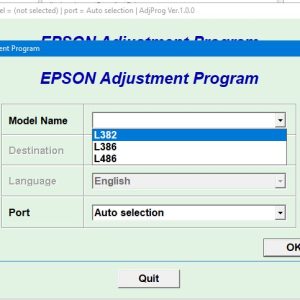
1. Free Download Epson EP709A Adjustment Program: DOWNLOAD
2. Place the downloaded software into the safe zone of your antivirus.
3. Extract the downloaded file using WinRAR software (if not already installed, download and install WinRAR software from the link: CLICK HERE), the password to extract the file is adjprogram.com
4. Open adjprog.exe, then you will see the Hardware ID.
The Epson EP709A Adjustment Program is a key activation tool used to unlock the full functionality of the Epson EP709A printer. By using this program, users can access advanced features and settings that are not available in the standard trial version. This key activation process allows users to customize their printing experience, improve print quality, and make adjustments to the printer’s settings. The Epson EP709A Adjustment Program is a valuable tool for ensuring optimal performance and functionality of the Epson EP709A printer.
How to Use Epson EP709A Adjustment Program?
Adjustment programs are essential tools for maintaining and fixing issues with various models of Epson printers. One such model is the Epson EP709A, a popular choice for both home and office use. In this guide, we will walk you through the steps of using the Adjustment Program for the Epson EP709A.
1. Download the Program
The first step is to download the Epson EP709A Adjustment Program from a reliable source. Make sure you download the correct version that is compatible with your operating system.
2. Install the Program
Once you have downloaded the program, install it on your computer following the on-screen instructions. Make sure to grant any necessary permissions for the program to run smoothly.
3. Connect Your Printer
Next, connect your Epson EP709A printer to your computer using a USB cable. Make sure the printer is turned on and recognized by your computer before proceeding.
4. Open the Program
Launch the Adjustment Program for the Epson EP709A on your computer. You should see a user-friendly interface with various options for adjusting and fixing issues with your printer.
5. Select Adjustment Options
Depending on the issue you are facing with your printer, select the appropriate adjustment options from the program. These options may include cleaning the print head, resetting the waste ink counter, or adjusting the paper feed settings.
6. Execute the Adjustments
Once you have selected the desired adjustment options, click on the Execute button to start the adjustment process. Follow any on-screen instructions to complete the adjustments successfully.
7. Test Your Printer
After completing the adjustments, test your Epson EP709A printer to ensure that the issues have been resolved. Print a test page and check for any remaining issues or anomalies.
8. Keep the Program Handy
It is a good idea to keep the Epson EP709A Adjustment Program handy for future use. Regular maintenance and adjustments can help prolong the life of your printer and ensure optimal performance.
By following these steps, you can effectively use the Epson EP709A Adjustment Program to fix and maintain your printer. Remember to always download software from trusted sources and follow safety precautions while using adjustment programs.
Need help or looking for a discount as a returning customer? Reach out to us directly via the Contact section. We’re happy to assist you.
Telegram: https://t.me/nguyendangmien
Facebook: https://www.facebook.com/nguyendangmien
Whatsapp: https://wa.me/+84915589236